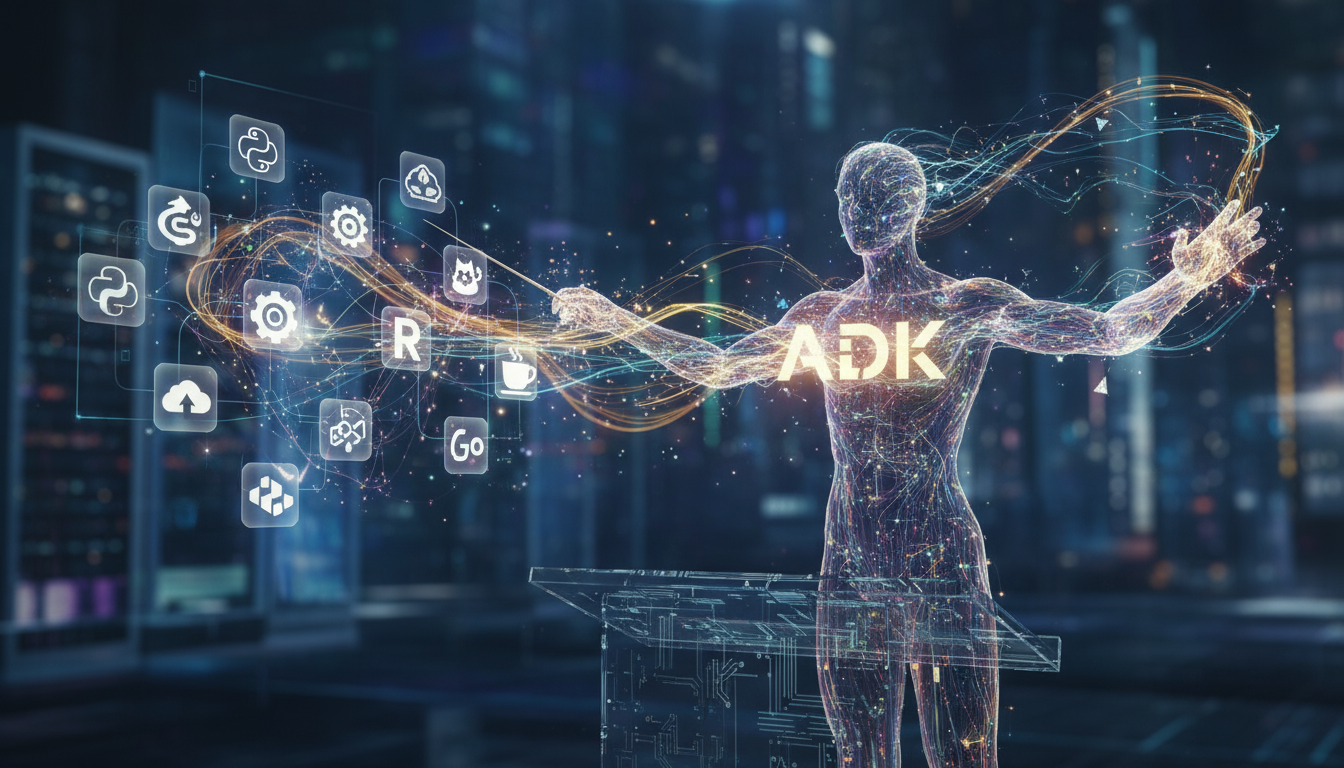
Building Scalable AI Agents: A Deep Dive into Decoupled Tools with ADK, MCP, and Cloud Run
Your new AI agent is brilliant, but it’s trapped. It can reason and converse, but it can’t do anything. It can’t check inventory, book a flight, or query a customer database. To unlock its true potential, it needs tools. But how you provide those tools is one of the most critical architectural decisions you’ll make. This decision is the difference between a clever prototype and a scalable, enterprise-grade system. This post will guide you through making that decision effectively.
The answer lies in a pattern that has already revolutionized modern software development. The shift from monolithic applications to microservices taught us the power of decoupling, independent scalability, and technological diversity. These same principles are now essential for building robust, enterprise-grade agentic systems—AI systems capable of autonomous action and decision-making. Early AI agents, similar to monolithic applications, often bundle their reasoning logic and tool integrations into a single process. While this approach simplifies prototyping, it quickly becomes brittle and difficult to scale as the number and complexity of tools grow, hindering true enterprise adoption.
As developers add more capabilities, they naturally begin creating separate services for these tools, effectively creating a microservice architecture. However, this introduces a new problem: a potential “quadratic explosion of dependencies,” where the number of required connections grows exponentially with the number of agents and tools. This means every agent requires a custom connector for every tool service. This is the exact bottleneck that early microservice architectures faced. The solution for that domain was standardized communication protocols and event-driven design. For AI agents, the solution is an open, standardized protocol for tool interaction.
graph TD
    subgraph "Solution: Standardized Protocol"
        direction LR
        SA1[Agent 1]
        SA2[Agent 2]
        SAn[...]

        MCP((MCP))

        ST1[Tool 1]
        ST2[Tool 2]
        STn[...]

        SA1 --> MCP;
        SA2 --> MCP;
        SAn --> MCP;
        MCP --> ST1;
        MCP --> ST2;
        MCP --> STn;
    end

    subgraph "Problem: N x M Connectors"
        direction LR
        A1[Agent 1]
        A2[Agent 2]
        An[...]

        T1[Tool 1]
        T2[Tool 2]
        Tn[...]

        A1 -- "Custom API" --> T1;
        A1 -- "Custom API" --> T2;
        A1 -- "Custom API" --> Tn;
        A2 -- "Custom API" --> T1;
        A2 -- "Custom API" --> T2;
        A2 -- "Custom API" --> Tn;
        An -- "Custom API" --> T1;
        An -- "Custom API" --> T2;
        An -- "Custom API" --> Tn;
    end
In this post, I’ll present a playbook for building these next-generation agentic systems using a powerful triad of technologies:
graph TD
    subgraph "Cloud Run (Serverless Platform)"
        A[ADK Agent]
        T[Tool Service]
    end
    A -- "MCP (Standardized Protocol)" --> T
- ADK: A flexible, code-first Python framework for building, evaluating, and deploying sophisticated AI agents with precision and control.
- Model Context Protocol (MCP): An open standard that acts as a universal adapter, or a “USB-C for AI,” allowing agents to communicate with tools in a standardized, language-agnostic way.
- Cloud Run: A fully managed, serverless platform that provides the ideal environment for deploying and scaling both the agent and its decoupled tool services with minimal operational overhead.
I’ll guide you from high-level architectural theory to a complete, production-ready implementation on Google Cloud, demonstrating how this combination provides a scalable, maintainable, and secure foundation for the future of AI applications. Ready to dive in? Let’s build your next-generation agentic system.
Table of Contents
- The Monolith Trap: Why Your Agent Needs Microservices
- MCP: The Universal Language for AI Tools
- Architecting a Modern Agent on Google Cloud
- The Playbook in Action: Building the Cloud Run Zoo Guide
- A Comparative Guide to Tooling Strategies in ADK
- Expanding Your Tool Ecosystem
- Conclusion: The Future is Composable and Standardized
The Monolith Trap: Why Your Agent Needs Microservices
Defining tools as simple in-process functions within an agent’s codebase is a straightforward way to start. However, this tight coupling becomes a significant bottleneck in production environments. Adopting a microservices-based architecture, where tools are deployed as independent services, unlocks several strategic advantages.
The Power of Independence
Decoupling agent tools into their own services offers benefits that are critical for building robust, enterprise-scale applications.
- Independent Scalability: In a real-world scenario, different tools will have vastly different performance characteristics. A tool that performs a complex data analysis or interacts with a high-traffic API may require significantly more CPU and memory than a simple utility tool. By deploying tools as separate services on a platform like Cloud Run, each tool can be scaled independently. This means a memory-hungry service can be provisioned with more resources without affecting the agent’s core reasoning service. This directly enhances performance, resilience, and cost-efficiency.
- Polyglot Development & Team Autonomy: A decoupled architecture empowers different teams to use the best technology for the job. For example, a data science team can build a recommendation tool in Python. A platform engineering team can build a high-concurrency infrastructure management tool in Go. An e-commerce team can also expose their existing Java-based inventory API. As long as each service adheres to a standard communication protocol like MCP, the ADK agent can consume them all. This eliminates concerns about the underlying implementation language. This fosters team autonomy and allows for the use of specialized tech stacks, optimizing development efficiency and innovation.
- Enhanced Reusability & Maintainability: A single, well-maintained “Customer Information” MCP server can be securely consumed by multiple agents, including sales, customer support, and marketing analytics agents. When the logic for retrieving customer data is updated, only that one microservice needs to be redeployed. This approach eliminates code duplication across multiple agent codebases, significantly reduces the risk of inconsistencies, and dramatically simplifies long-term maintenance efforts.
The Price of Power: Latency and Complexity
Like any architectural decision, decoupling is not without its costs. It is essential to understand the challenges inherent in a distributed system.
-
Network Latency: The first trade-off you’ll notice is speed. An in-process function call is measured in nanoseconds. In contrast, a network call between two Cloud Run services—even within the same Google Cloud region—is measured in milliseconds.
This added latency from network hops requires careful consideration in system design, as it directly impacts the end-user experience. Strategies like caching and asynchronous communication can help mitigate this, but the overhead is unavoidable.
-
Operational Complexity: A distributed system is inherently more complex to manage than a monolith. Developers become responsible for service discovery, secure inter-service communication, distributed logging and tracing, and managing multiple deployment pipelines. While platforms like Google Cloud provide powerful tools to manage this complexity, it demands more from your development team.
MCP: The Universal Language for AI Tools
To overcome the integration challenges of a decoupled tool architecture, a standardized communication layer is required. The Model Context Protocol (MCP) is an open standard, originally developed by Anthropic, designed to be this universal interface. It specifies how an AI application can discover and interact with external capabilities. This effectively acts as a “USB-C port for AI,” replacing fragmented, custom integrations with a single, reliable protocol.
The MCP Architecture Explained
An MCP interaction involves two key participants in a classic client-server model.
graph LR
    MCP_Client["MCP Client<br/>(e.g., ADK Agent)"] -- MCP --> MCP_Server["MCP Server<br/>(e.g., Tool Service)"];
- MCP Client: This is the component that initiates and manages a connection
to an MCP Server. In this architecture, the Google ADK agent acts as the
client, using the
MCPToolsetclass to handle the protocol’s implementation. - MCP Server: This is a program—typically a microservice—that exposes a set of capabilities (tools, resources, or prompts) to connecting clients. In this end-to-end example, I will build an MCP Server in Rust. I will then deploy it as a secure service on Cloud Run.
How it Works
Communication between the client and server occurs over a standardized protocol based on JSON-RPC 2.0. The typical flow involves a few key steps:
graph LR
    A[1. Connection <br/> Client establishes connection with MCP server] --> B[2. Discovery <br/> Server advertises available tools via `tools/list`]
    B --> C[3. Execution <br/> Client executes a tool via `tools/call`]
This standardized, message-based exchange is what enables the powerful polyglot and reusable nature of the architecture. Any client and server that can “speak” MCP can interact, regardless of their internal implementation.
Architecting a Modern Agent on Google Cloud
Now that the conceptual framework is established, we can visualize the complete architecture of a modern, decoupled AI agent system built on Google Cloud. The system comprises two primary services deployed on Cloud Run: the ADK Agent Service and the MCP Tool Service.
The Big Picture: Component Diagram
This diagram illustrates the high-level components and their interactions. The user communicates with the ADK Agent, which orchestrates calls to the Gemini model for reasoning and to the MCP Server for tool execution.
graph LR
    A[User] -->|HTTPS Request| B(ADK Agent Service on Cloud Run);
    B -->|LLM Call via Vertex AI API| C{Gemini 2.5 Model};
    C -->|Function Calling Decision| B;
    B -->|Secure HTTPS Call with OIDC Token| D(MCP Tool Service on Cloud Run);
    D -->|Business Logic| E[Backend Services / Databases];
    E -->|Data| D;
    D -->|Tool Result| B;
    B -->|Final LLM Call for Synthesis| C;
    C -->|Final Response| B;
    B -->|HTTPS Response| A;
The Blow-by-Blow: Interaction Sequence Diagram
This sequence diagram details the step-by-step flow for a single tool-calling request, highlighting the crucial authentication step where the ADK Agent service obtains an OIDC identity token to securely call the private MCP Tool service.
sequenceDiagram
    participant User
    participant ADK_Agent_Service as ADK Agent (Cloud Run)
    participant Gemini_Model as Gemini 2.5 (Vertex AI)
    participant MCP_Tool_Service as MCP Server (Cloud Run)

    User->>+ADK_Agent_Service: POST /run (Prompt: "Tell me about the lion.")
    ADK_Agent_Service->>+Gemini_Model: generate_content(prompt, tools=[get_animal_details])
    Gemini_Model-->>-ADK_Agent_Service: FunctionCall(name='get_animal_details', args={'animal_name': 'lion'})

    Note over ADK_Agent_Service: Agent needs to call the MCP Server.

    ADK_Agent_Service->>+ADK_Agent_Service: 1. Get Service Account credentials
    ADK_Agent_Service->>+ADK_Agent_Service: 2. Request OIDC Identity Token for MCP Server's URL (audience)

    Note over ADK_Agent_Service: Token is fetched from Metadata Server

    ADK_Agent_Service->>+MCP_Tool_Service: POST /mcp (Authorization: Bearer, body: {tool_call: 'get_animal_details', args: {'animal_name': 'lion'}})
    MCP_Tool_Service-->>-ADK_Agent_Service: 200 OK (Tool Result: {"habitat": "savanna", "diet": "carnivore"})

    ADK_Agent_Service->>+Gemini_Model: generate_content(prompt, tool_result)
    Gemini_Model-->>-ADK_Agent_Service: Final Response: "The lion is a carnivore and lives in the savanna."
    ADK_Agent_Service-->>-User: 200 OK ("The lion is a carnivore and lives in the savanna.")
The Playbook in Action: Building the Cloud Run Zoo Guide
This section provides a complete, step-by-step guide to building and deploying a “Zoo Tour Guide” agent. The ADK agent will use a remote MCP server, built in Rust, to fetch details about zoo animals. Both the agent and the tool server will be deployed as secure, serverless containers on Cloud Run
Access the complete source code for the “Zoo Tour Guide” agent and the Rust MCP server discussed in this post directly from my GitHub repository.
To gain a hands-on understanding of these concepts, clone the repository and follow the deployment steps.
Prerequisites
Before you begin, make sure you have the following tools installed and configured:
- Google Cloud SDK:
The
gcloudcommand-line tool, authenticated to your account. - Docker: To build and containerize the services.
- Rust: The Rust toolchain for building the MCP server.
- Python 3.13.7 and uv: For creating the ADK agent’s environment.
Note: The versions for tools like Python and Rust are what was used to write this guide. It’s always a good practice to check for and use the latest stable versions available.
Google Cloud Project Setup
First, prepare your Google Cloud environment by following these steps:
-
Select or Create a Project: In the Google Cloud Console, select an existing project or create a new one. Ensure that billing is enabled for the project.
-
Enable APIs: Use the
gcloudcommand-line tool to enable the necessary APIs for your project.Terminal window gcloud services enable \run.googleapis.com \aiplatform.googleapis.com \iam.googleapis.com \artifactregistry.googleapis.com \cloudbuild.googleapis.com -
Set Up Local Environment: Create a Python virtual environment for the ADK agent using
uvand ensure you have the Rust toolchain installed for the MCP server.Terminal window # For the Python Agent# Install uv if you haven't alreadycurl -LsSf https://astral.sh/uv/install.sh | sh# Create and activate a virtual environmentmkdir adk_zoo_agent && cd adk_zoo_agentuv venvsource .venv/bin/activate# Install dependenciesuv add google-adk fastapi "uvicorn[standard]" google-auth# For the Rust Server (if not already installed)curl --proto '=https' --tlsv1.2 -sSf https://sh.rustup.rs | sh
Building and Deploying the Rust “Zoo Animals” MCP Server
The MCP server will act as the tool backend, providing a single tool:
get_animal_details.
-
Create Project Structure:
Terminal window cd .. # if you're in the adk_zoo_agent/ directorycargo new --bin zoo_mcp_server_rustcd zoo_mcp_server_rust -
Define Dependencies (
Cargo.toml): Add the necessary crates for building a web server with MCP capabilities. I’ll use axum for the web framework, which runs on the powerful Tokio asynchronous runtime, and the official rmcp Rust SDK. While the versions below are known to work, feel free to check for newer compatible versions on crates.io.zoo_mcp_server_rust/Cargo.toml [package]name = "zoo_mcp_server_rust"version = "0.1.0"edition = "2021"[dependencies]rmcp = { version = "0.8.0", features = ["server", "macros", "transport-streamable-http-server"] }serde = { version = "1.0.228", features = ["derive"] }serde_json = "1.0.145"tokio = { version = "1.47.1", features = ["rt-multi-thread", "macros", "net", "signal"] }anyhow = "1.0.100"schemars = "1.0.4"axum = "0.8.6"tracing = "0.1.41"tracing-subscriber = { version = "0.3.20", features = ["env-filter", "fmt"] } -
Write the MCP Server Code (
src/main.rs): This script uses axum and the rmcp crate to create an MCP server. It defines one tool that returns static data about zoo animals.zoo_mcp_server_rust/src/main.rs use rmcp::{handler::server::{router::tool::ToolRouter,wrapper::{Json, Parameters},},model::{ServerCapabilities, ServerInfo},schemars, tool, tool_handler, tool_router, ServerHandler,transport::streamable_http_server::{session::local::LocalSessionManager, StreamableHttpService},};use tracing_subscriber::{layer::SubscriberExt, util::SubscriberInitExt};use serde::{Deserialize, Serialize};use std::collections::HashMap;#[derive(Deserialize, schemars::JsonSchema)]struct GetAnimalDetailsRequest {animal_name: String,}#[derive(Serialize, schemars::JsonSchema)]struct AnimalDetails {habitat: String,diet: String,}#[derive(Serialize, schemars::JsonSchema)]struct ErrorResponse {error: String,}#[derive(Debug, Clone)]pub struct ZooServer {tool_router: ToolRouter<Self>,}#[tool_router]impl ZooServer {pub fn new() -> Self {Self {tool_router: Self::tool_router(),}}#[tool(description = "Get details about an animal")]fn get_animal_details(&self,Parameters(GetAnimalDetailsRequest { animal_name }): Parameters<GetAnimalDetailsRequest>,) -> Json<serde_json::Value> {let mut zoo_data = HashMap::new();zoo_data.insert("lion",AnimalDetails {habitat: "savanna".to_string(),diet: "carnivore".to_string(),},);zoo_data.insert("penguin",AnimalDetails {habitat: "antarctica".to_string(),diet: "piscivore".to_string(),},);zoo_data.insert("giraffe",AnimalDetails {habitat: "savanna".to_string(),diet: "herbivore".to_string(),},);let animal_name_lower = animal_name.to_lowercase();let result = match zoo_data.get(animal_name_lower.as_str()) {Some(details) => serde_json::to_value(details).unwrap(),None => serde_json::to_value(&ErrorResponse {error: format!("Animal '{}' not found.", animal_name),}).unwrap(),};Json(result)}}#[tool_handler]impl ServerHandler for ZooServer {fn get_info(&self) -> ServerInfo {ServerInfo {instructions: Some("A server for getting animal details.".into()),capabilities: ServerCapabilities::builder().enable_tools().build(),..Default::default()}}}#[tokio::main]async fn main() -> anyhow::Result<()> {tracing_subscriber::registry().with(tracing_subscriber::EnvFilter::try_from_default_env().unwrap_or_else(|_| "info".into()),).with(tracing_subscriber::fmt::layer()).init();let service = StreamableHttpService::new(|| Ok(ZooServer::new()),LocalSessionManager::default().into(),Default::default(),);let router = axum::Router::new().nest_service("/mcp", service);let tcp_listener = tokio::net::TcpListener::bind("0.0.0.0:8080").await?;axum::serve(tcp_listener, router).with_graceful_shutdown(async { tokio::signal::ctrl_c().await.unwrap() }).await?;Ok(())} -
Create the
Dockerfile: This multi-stageDockerfilecompiles the Rust application and copies the binary into a minimal, secure final image.zoo_mcp_server_rust/Dockerfile # Stage 1: Build the application# It's a good practice to use the latest stable Rust version.FROM rust:1.90 as builderWORKDIR /usr/src/appCOPY . .RUN cargo build --release# Stage 2: Create the final, minimal image# Using a minimal, secure base image is recommended.FROM gcr.io/distroless/cc-debian12COPY --from=builder /usr/src/app/target/release/zoo_mcp_server_rust /CMD ["/zoo_mcp_server_rust"] -
Deploy to Cloud Run (Securely): Deploy the service using
gcloud run deploy. The--no-allow-unauthenticatedflag ensures the service is private and can only be invoked by authenticated services.Terminal window export PROJECT_ID=$(gcloud config get-value project)export REGION="us-central1" # Or your preferred regiongcloud run deploy zoo-mcp-server-rust \--source . \--region=$REGION \--no-allow-unauthenticatedTake note of the Service URL provided in the output. It will look like
https://zoo-mcp-server-rust-....a.run.app.
Building and Deploying the ADK “Tour Guide” Agent
The ADK agent will be the reasoning layer, using the secure Rust-based MCP server as its tool.
-
Create Project Structure:
Terminal window cd .. # Back to the project's root directory# (Assuming you are in the directory where you ran the `uv venv` command)mkdir -p zoo_adk_agent/zoo_tour_guidecd zoo_adk_agent -
Write the Agent Code (
zoo_tour_guide/agent.py): This script defines the ADK agent. The most important part is the MCPToolset configuration, which includes the logic to fetch an OIDC identity token for authenticating with the secure MCP server. This keyless security pattern is a best practice for service-to-service communication on Google Cloud.zoo_adk_agent/zoo_tour_guide/agent.py import osimport google.auth.transport.requestsimport google.oauth2.id_tokenfrom google.adk.agents import Agentfrom google.adk.tools.mcp_tool import MCPToolset, StreamableHTTPConnectionParams# Fetch the MCP server URL from an environment variableMCP_SERVER_URL = os.environ.get("MCP_SERVER_URL")if not MCP_SERVER_URL:raise ValueError("MCP_SERVER_URL environment variable not set.")def get_auth_headers(mcp_server_url: str) -> dict[str, str]:"""Fetches a Google-signed OIDC identity token and formats it as auth headers.The token is valid for invoking a private Cloud Run service."""# The audience for the token must be the root URL of the Cloud Run service.# We remove the '/mcp' path to get the base URL.audience = mcp_server_url.removesuffix("/mcp")auth_req = google.auth.transport.requests.Request()# This will fetch a cached token or a new one if it's expired.id_token = google.oauth2.id_token.fetch_id_token(auth_req, audience)return {"Authorization": f"Bearer {id_token}"}# For a serverless environment like Cloud Run, fetching the token at startup# is generally sufficient. This is because instances are short-lived. The ADK's# MCPToolset takes static headers, so we provide them here.mcp_tools = MCPToolset(connection_params=StreamableHTTPConnectionParams(url=MCP_SERVER_URL,headers=get_auth_headers(MCP_SERVER_URL)))root_agent = Agent(model="gemini-2.5-flash",name="zoo_tour_guide",instruction="You are a helpful tour guide for a zoo. Use your tools to answer questions about the animals.",tools=[mcp_tools]) -
Expose the Agent (
zoo_tour_guide/__init__.py): Create an__init__.pyfile to define thezoo_tour_guidedirectory as a Python package to make theroot_agenteasily importable by the application’s entrypoint.zoo_adk_agent/zoo_tour_guide/__init__.py from . import agent -
Create the FastAPI Entrypoint (
main.py): This script wraps the ADK agent in a FastAPI application, making it servable by Cloud Run.zoo_adk_agent/main.py import pathlibfrom fastapi import FastAPIfrom google.adk.cli.fast_api import get_fast_api_app# Set web=True if you intend to serve a web interface, False otherwiseSERVE_WEB_INTERFACE = False# Call the function to get the FastAPI app instance# Ensure the agent directory name ('zoo_adk_agent') matches your agent folderapp: FastAPI = get_fast_api_app(agents_dir=str(pathlib.Path(__file__).parent.resolve()),web=SERVE_WEB_INTERFACE,) -
Create the
Dockerfile: ThisDockerfileusesuvto create an efficient container image.zoo_adk_agent/Dockerfile # It's a good practice to use the latest stable Python version.FROM python:3.13.7-slimCOPY --from=ghcr.io/astral-sh/uv:latest /uv /uvx /bin/RUN apt-get update && apt-get install -y build-essential --no-install-recommends && rm -rf /var/lib/apt/lists/*WORKDIR /appCOPY pyproject.toml .ENV PYTHONUNBUFFERED=1RUN uv syncCOPY . .EXPOSE 8080CMD ["uv", "run", "uvicorn", "main:app", "--host", "0.0.0.0", "--port", "8080"] -
Configure IAM Permissions: The agent service needs explicit permission to invoke the private MCP server. Grant the agent’s service account the Cloud Run Invoker (
roles/run.invoker`) role on the MCP server service.Terminal window # Get the service account email for the ADK agent service# The default format is: PROJECT_NUMBER-compute@developer.gserviceaccount.comPROJECT_NUMBER=$(gcloud projects describe $PROJECT_ID --format="value(projectNumber)")AGENT_SA="${PROJECT_NUMBER}-compute@developer.gserviceaccount.com"gcloud run services add-iam-policy-binding zoo-mcp-server-rust \--member="serviceAccount:${AGENT_SA}" \--role="roles/run.invoker" \--region=$REGION -
Deploy the Agent to Cloud Run: Deploy the agent service, passing the secure MCP server’s URL as an environment variable. I will allow unauthenticated access to this agent service so we can easily call it with curl.
Terminal window # Get the URL of the deployed MCP serverMCP_URL=$(gcloud run services describe zoo-mcp-server-rust --region=$REGION --format="value(status.url)")# Deploy the agent, passing the MCP server's URLgcloud run deploy zoo-adk-agent \--source ./zoo_adk_agent \--region=$REGION \--allow-unauthenticated \--set-env-vars="GOOGLE_CLOUD_PROJECT=$PROJECT_ID,GOOGLE_CLOUD_LOCATION=$REGION,GOOGLE_GENAI_USE_VERTEXAI=TRUE,MCP_SERVER_URL=${MCP_URL}/mcp"
Seeing it all in Action
Now that both services are deployed and securely connected, you can interact with the system.
-
Get the Agent’s URL:
Terminal window AGENT_URL=$(gcloud run services describe zoo-adk-agent \--region=$REGION --format="value(status.url)") -
Interact with the Agent: With the agent running, you can now start a conversation. ADK uses sessions to maintain conversational history. First, you initialize a session for a specific user, and then you send prompts within that session.
You can choose any identifiers for the
user_idandsession_id.Terminal window # 1. Initialize a new session for 'user_123'curl -X POST \"$AGENT_URL/apps/zoo_tour_guide/users/user_123/sessions/session_abc" \-H "Content-Type: application/json"# 2. Send a prompt within that sessioncurl -X POST "$AGENT_URL/run_sse" \-H "Content-Type: application/json" \-d '{"app_name": "zoo_tour_guide","user_id": "user_123","session_id": "session_abc","new_message": {"role": "user","parts": [{"text": "Hello, tell me about the lions."}]},"streaming": false}' -
Verify the Response: Because you used the
/run_sseendpoint, the agent streams back a series of Server-Sent Events (SSE) that show its reasoning process. The following diagram illustrates the entire function-calling flow. This includes the model’s ability to correct itself after an initial error.sequenceDiagram participant User participant ADK_Agent as ADK Agent Service participant Gemini as Gemini 2.5 Model participant MCP_Server as MCP Tool Service User->>+ADK_Agent: Prompt: "Hello, tell me about the lions." ADK_Agent->>+Gemini: generate_content(prompt, tools) Gemini-->>-ADK_Agent: 1. functionCall: get_animal_details("lions") ADK_Agent->>+MCP_Server: Call tool: get_animal_details("lions") MCP_Server-->>-ADK_Agent: 2. Tool Error: "Animal 'lions' not found." ADK_Agent->>+Gemini: generate_content(prompt, tool_result=error) Gemini-->>-ADK_Agent: 3. Self-Correction: functionCall: get_animal_details("lion") ADK_Agent->>+MCP_Server: Call tool: get_animal_details("lion") MCP_Server-->>-ADK_Agent: 4. Tool Success: {diet: "carnivore", habitat: "savanna"} ADK_Agent->>+Gemini: generate_content(prompt, tool_result=success) Gemini-->>-ADK_Agent: 5. Final Synthesis: "Lions are carnivores..." ADK_Agent-->>-User: Final Response: "Lions are carnivores and their natural habitat is the savanna."This sequence demonstrates the agent’s resilience:
- First Attempt: The model initially tries to call the tool with the
plural
"lions". - Error and Retry: The MCP server returns an error, which the ADK agent feeds back to the model.
- Self-Correction: The model understands the error and corrects its
request to the singular
"lion". - Success: The tool call succeeds.
- Final Answer: The model synthesizes the correct information into a helpful response.
By checking the logs for both Cloud Run services in the Google Cloud Console using Cloud Logging, you can also trace this entire flow from the server’s perspective with Cloud Trace. This confirms that the entire distributed, secure agentic system is working as designed.
- First Attempt: The model initially tries to call the tool with the
plural
A Comparative Guide to Tooling Strategies in ADK
ADK is designed for flexibility, offering a spectrum of choices for integrating tools into your agent. Selecting the right strategy depends on your specific requirements for performance, scalability, and implementation complexity.
In-Process Functions (FunctionTool)
This is the most direct method for adding a tool. A standard Python function is
defined within the agent’s codebase and wrapped with the FunctionTool class.
The tool’s code executes in the same process as the agent itself.
Code Example:
from google.adk.tools import FunctionToolimport datetime
def get_current_date(): """Returns today's date in YYYY-MM-DD format.""" return datetime.date.today().isoformat()
# Wrap the function to create a tooldate_tool = FunctionTool(get_current_date)Best for simple, stateless utilities, calculations, or logic that is core to the agent’s immediate process and does not require heavy computation or external dependencies.
Agent-as-a-Tool (AgentTool)
ADK supports building complex, multi-agent systems using a hierarchical pattern
where a primary “coordinator” agent can delegate specific tasks to more
specialized “worker” agents. The AgentTool class wraps an entire agent, making
it callable as a tool by another agent.
Code Example:
from google.adk.agents import Agentfrom google.adk.tools import AgentTool, google_search
# Define a specialist agent for web searchessearch_specialist = Agent( model="gemini-2.5-flash", instruction="You are an expert at using Google Search to find information.", tools=[google_search])
# Wrap the specialist agent so it can be used as a toolsearch_as_a_tool = AgentTool(agent=search_specialist)Best for building sophisticated, multi-agent workflows where tasks require distinct reasoning capabilities or access to a unique set of tools (e.g., a “router” agent delegating to “billing” and “shipping” sub-agents).
OpenAPI Specifications (OpenAPIToolset)
For agents that need to interact with existing REST APIs, the OpenAPIToolset
is a powerful feature. It ingests an
OpenAPI v3 specification (in JSON or YAML format) and
automatically generates a callable RestApiTool for each defined API operation.
ADK handles the parsing, tool schema generation, and HTTP request execution.
Code Example:
from google.adk.tools import OpenAPIToolset
# Assume 'petstore_spec.json' contains a valid OpenAPI v3 specificationwith open("petstore_spec.json", "r") as f: spec_str = f.read()
# The toolset automatically creates tools for each API endpointopenapi_tools = OpenAPIToolset(spec_str=spec_str, spec_str_type="json")Best for rapidly integrating existing internal or third-party RESTful services that are well-documented with an OpenAPI specification.
MCP Servers (MCPToolset)
This strategy, the primary focus of this post, provides the maximum level of
decoupling. The MCPToolset connects the ADK agent to a remote,
language-agnostic tool server that conforms to the Model Context Protocol
standard. This enables a true microservices architecture for agent tools.
Code Example:
from google.adk.tools.mcp_tool import MCPToolset, StreamableHTTPConnectionParams
# Connect to a remote MCP server deployed on Cloud Runmcp_tools = MCPToolset( connection_params=StreamableHTTPConnectionParams( url="https://my-mcp-server-xyz.a.run.app/mcp/" ))Best for building production-grade, scalable agentic systems with a diverse and reusable set of tools, particularly in an enterprise environment where multiple teams and technologies must coexist.
Choosing Your Tooling Strategy: A Golden Path
ADK’s flexibility is a key strength, but it also requires a strategic choice. I
recommend a “start simple, scale later” approach. For quick prototypes or core
logic, begin with an in-process FunctionTool. As you integrate existing APIs,
use the OpenAPIToolset. For complex, multi-step reasoning, AgentTool allows
you to build sophisticated hierarchies. Finally, for enterprise-grade,
scalable, and reusable tools, the MCPToolset is your ultimate goal. This is
the primary focus of this guide. The following table breaks down these
trade-offs.
| Method | Primary Use Case | Performance (Latency) | Scalability | Language | Implementation Complexity |
|---|---|---|---|---|---|
In-Process (FunctionTool) | Simple, stateless utilities and calculations. | Very Low (nanoseconds) | Coupled with agent | Python only | Low |
Agent-as-a-Tool (AgentTool) | Hierarchical, multi-agent reasoning tasks. | High (multiple LLM calls) | Coupled with agent(s) | Python only | Medium |
OpenAPI (OpenAPIToolset) | Integrating existing REST APIs with specs. | Medium (network call) | Independent | Any (for API) | Low (if spec exists) |
MCP Server (MCPToolset) | Enterprise-grade, reusable, polyglot tool services. | Medium (network call) | Independent | Any (for server) | Medium |
Expanding Your Tool Ecosystem
The true power of this architecture is its extensibility. The Python-based ADK agent can now communicate with any MCP server, regardless of the language it was built in. This allows you to build a rich, polyglot ecosystem of reusable tools across your organization.
graph TD
    A[ADK Agent] -->|MCP| B(Python Tool)
    A -->|MCP| C(Rust Tool)
    A -->|MCP| D(Node.js Tool)
    A -->|MCP| E(Go Tool)
    A -->|MCP| F(Java Tool)
    A -->|MCP| G(...)
To help you get started, the following table lists official and popular community SDKs for building MCP servers in various languages.
Python 🐍
Framework: FastMCP
from fastmcp import FastMCP
mcp = FastMCP("Calculator")
@mcp.tool()def add(a: int, b: int) -> int: return a + bHigh-level, decorator-based framework for rapid development.
Rust 🦀
SDK: @modelcontextprotocol/rust-sdk
use rmcp::server::prelude::*;
#[tool]async fn add(input: (i32, i32)) -> Result<i32, McpError> { Ok(input.0 + input.1)}High-performance, type-safe SDK with macro support for easy tool definition.
Node.js 🚀
SDK: @modelcontextprotocol/sdk
import { McpServer } from "@mcp/sdk/server";
const server = new McpServer({ ... });
server.registerTool("add", { ... }, (params) => { return params.a + params.b;});The official TypeScript/JS SDK, providing core server and client classes.
Go 🐹
SDK: @modelcontextprotocol/go-sdk
import "[github.com/mcp/go-sdk/mcp](https://github.com/mcp/go-sdk/mcp)"
server := mcp.NewServer(...)
mcp.AddTool(server, &mcp.Tool{...}, func(...) (any, error) { // ...})Official Go SDK maintained in collaboration with Google.
Java ☕
Integration: Spring AI MCP
@McpTool(name="add")public int add(@RequestParam int a, @RequestParam int b) { return a + b;}Official integration with Spring Boot for enterprise applications.
Kotlin 🤖
SDK: @modelcontextprotocol/kotlin-sdk
server.addTool("add", ...) { req -> val a = req.arguments["a"] as Int val b = req.arguments["b"] as Int // ...}Official Kotlin Multiplatform SDK with Ktor integration.
C# 🎵
SDK: ModelContextProtocol
public static class MyTools { public static int Add(int a, int b) => a + b;}Official C# SDK with ASP.NET Core integration.
Ruby ♦️
SDK: @modelcontextprotocol/ruby-sdk
server.tool("add") do |a, b| a + bendThe official Ruby gem for building MCP servers and clients.
PHP 🐘
SDK: php-mcp/server
#[McpTool]public function add(int $a, int $b): int { return $a + b;}Community SDK with attribute-based discovery for tools.
Conclusion: The Future is Composable and Standardized
I’ve gone from architectural theory to a production-ready agent running securely on Google Cloud. The takeaway is clear: combining a smart framework like ADK, a universal protocol like MCP, and a serverless platform like Cloud Run is more than a technical exercise. It’s the playbook for building the next generation of AI applications.
By embracing the principles of microservices, you can move away from brittle, monolithic agents and toward a composable ecosystem of reusable, language-agnostic tools. MCP provides the standard interface that makes this ecosystem possible, while ADK offers the powerful orchestration engine to drive it. Finally, Cloud Run provides the serverless foundation. It handles the operational complexity of scaling and securing this distributed system, allowing developers to focus on what truly matters: building powerful and useful AI agents.
The future of agentic AI is not just about more powerful models; it is about building smarter architectures. The path forward is standardized, composable, and scalable. I encourage you to explore the ADK and contribute to the open-source MCP community. Start building your own decoupled agent tools on Google Cloud today.
Ready to build your own? The best way to solidify these concepts is to get hands-on. Follow this step-by-step tutorial to deploy your own secure, remote MCP server on Google Cloud and start building a truly scalable tool ecosystem for your agents.